COLLECTOR’S FIELD GUIDE
Help & FAQ
Quick answers for your next collection.
How do I get started and sign in?
Browse public places, lists and quests in Explore. Sign in with Google or email to create content, join quests and manage your private Items. Use the same sign-in method when returning to your account. If access fails, include the displayed error when contacting support.
Which features are available in the current beta?
The beta supports the existing place catalog, manual POIs, lists, quests, trip planning, Items and proofs. Google and email sign-in are enabled. Microsoft sign-in, Apple sign-in, payments and Google Places search are currently disabled. Availability may change as the beta develops; an unavailable option does not mean your account is broken.
How do I add a place that is missing from the catalog?
Open Create a POI in the list builder. Choose a region, enter the place name and valid latitude and longitude, then complete any required fields for its types. Add an address or notes if useful. You can keep the POI private or submit it for public use; search visibility is a separate choice. Public submissions follow moderation.
How do I update a list and its places?
Open a list you own and choose Edit. Update its title or description, add or remove places, arrange their order and save. Removing a place from the list does not delete the POI itself. Changes create a new revision. If an updated public list is awaiting review, its previously approved revision can remain public; check My submissions for the result.
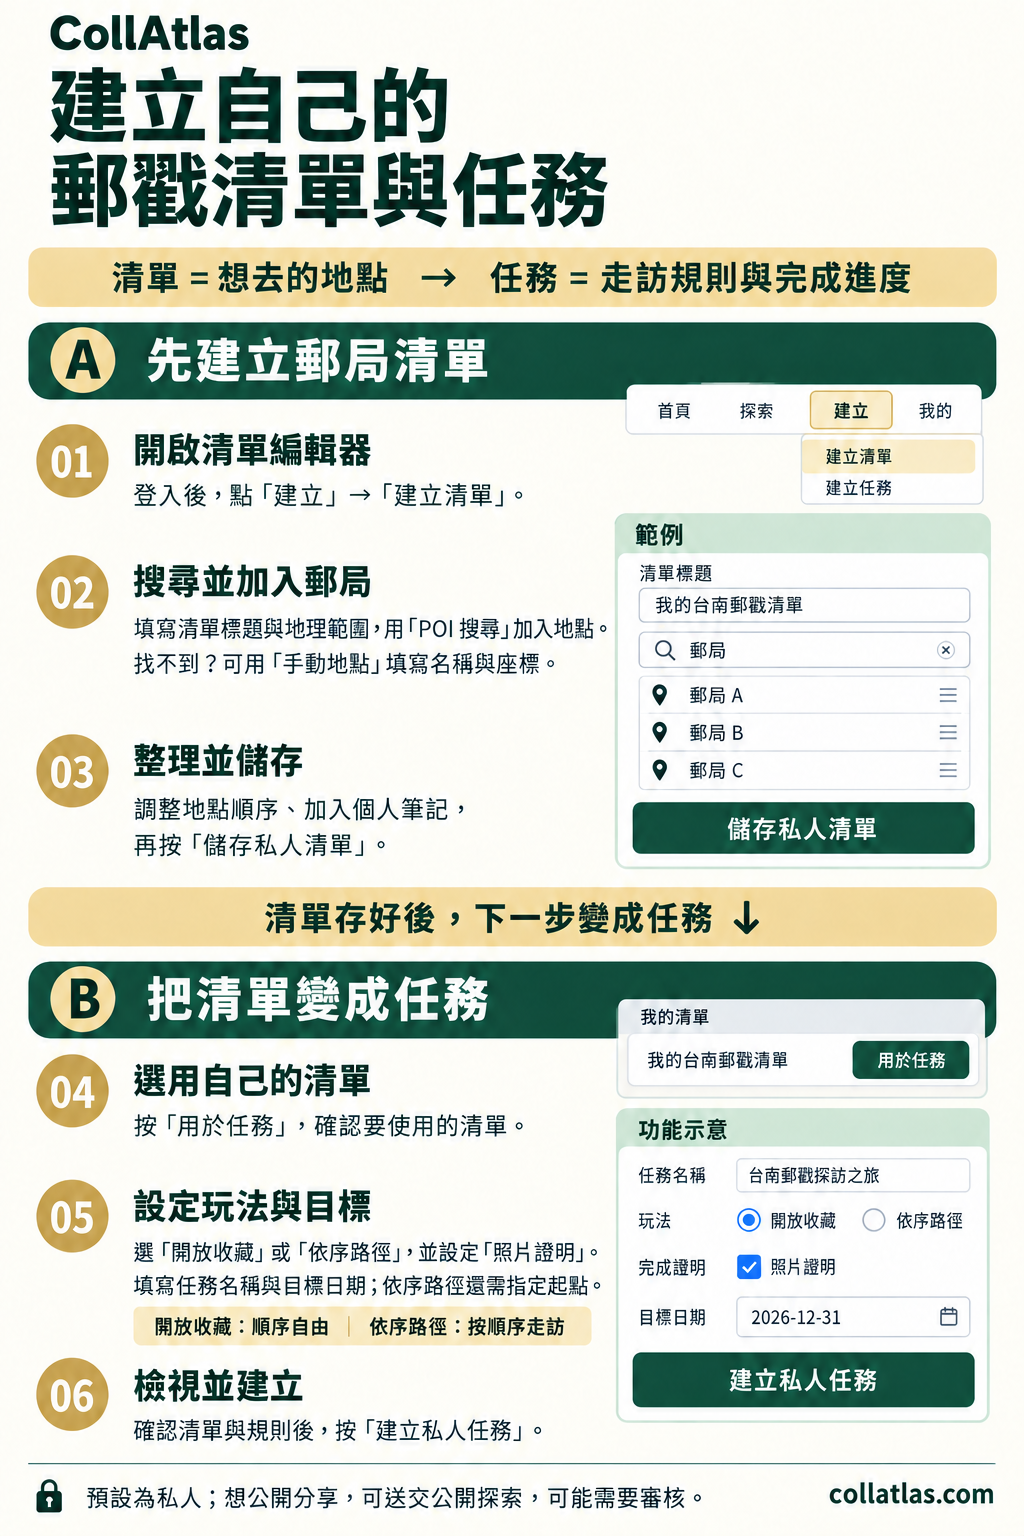
Create your own list and quest
Sign in and create a list. Search for post offices or add places manually, arrange them, and save. Use the list for a quest, choose a collection mode and proof requirements, set a name and target date, then review and create it.
Image language: Traditional Chinese
 Open full-size image (opens in a new tab)
Should my quest keep a list version or follow the latest one?
Keep this list version fixes the quest to that exact list and place order. Always use latest follows the latest approved list, so its places and order can change. Completed places that still match remain recorded. Choose the version mode when creating or editing the quest, and review its points and proof rules before saving.
What completes a collect-item quest stop?
Follow the quest’s collectible rules. A stop can require any matching collectible, all matching types, or specific catalog collectibles. For a pictorial-postmark quest, other postmark types do not count. Saving an Item alone does not submit proof.
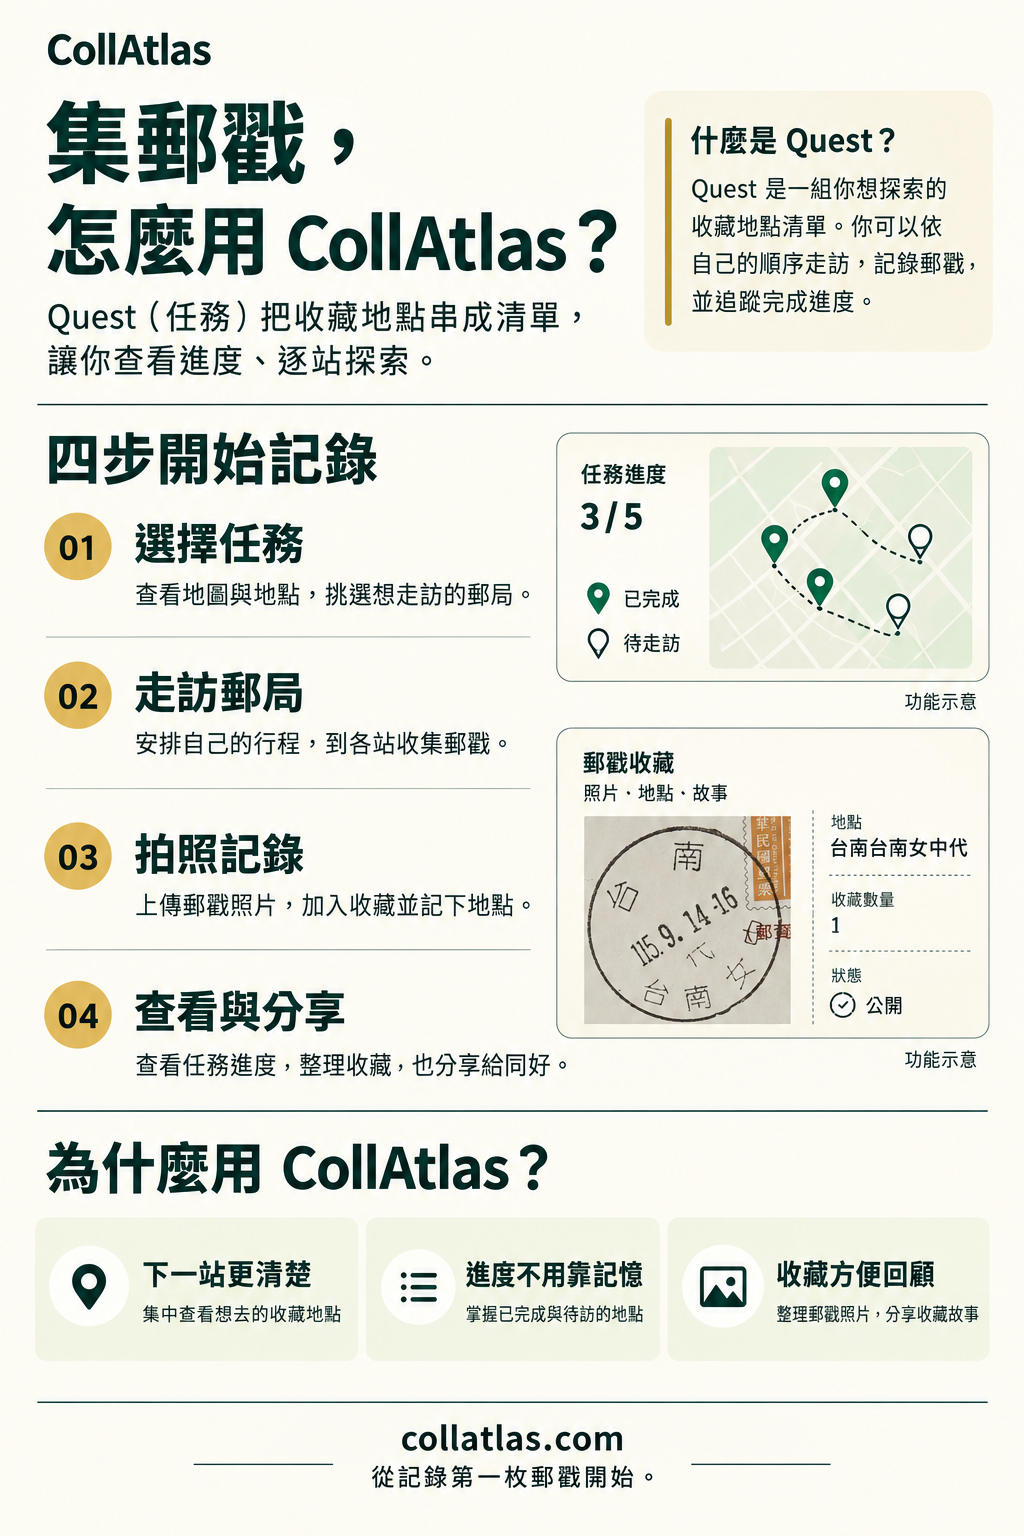
Collect postmarks with CollAtlas
Choose a quest, visit its post offices, upload postmark photos, and review your progress. Keep locations and collection memories together, then share when you want to.
Image language: Traditional Chinese
 Open full-size image (opens in a new tab)
Why is my location unavailable or my check-in rejected?
Allow location access for both your browser and this site, and enable device location services. A check-in needs a fresh position within the stop’s distance and accuracy limits. If the reading is weak, move to a clearer location and retry. You can choose a place or coordinates for a trip’s starting point, but that does not count as a check-in. Exact check-in coordinates are not included in public visits.
How should I choose between trip routes?
Choose your quests, start, end and available time. Nearby wins favors a short outing; Balanced trail adds more stops while limiting detours; Quest mix advances a wider mix of selected quests. The current planner uses walking estimates, not turn-by-turn navigation. If no stop fits, adjust the time or endpoints and plan again. Save a trip to revisit it; it is private to its owner and authorized staff by default. Choose Create share link to let anyone with the link view the saved route and exact start and finish locations, and Stop sharing to revoke the link.
What are Items and which photos can I upload?
Items group your photos with a title, type, inventory ID and tags. Use JPEG, PNG or WebP within the displayed per-image size limit; there is no image-count quota. Items stay private unless you choose Public. Saving an Item does not automatically submit collectible proof.
How does bulk adding Items work?
Choose or drop photos, set 1 or more images per Item, and review the groups before creating. Photos follow the displayed order; each group’s first photo is its cover, and a smaller final group is kept. Give each Item a title. Keep the page open while saving. Pausing or retrying preserves completed Items; leaving discards the remaining batch, while saved Items stay in your inventory.